| Let's Install Linux! | |
| T.J. Newton |
|
| Linux is
one cool operating system! Powerful. Smart. Fast. Efficient. That's what
today's computers demand. And now Linux supports Steam, as well as a ton
of apps for everything from editing videos to running an office. Best of
all, Linux is free! Linux is used throughout the world to handle the tough stuff - like running most of the Internet - but it's lightweight enough to run a smartphone! Install Linux now and you'll never look back at Windows! Of course, booting into Windows is as simple as the touch of a button with Linux these days... You've got nothing to lose and everything to gain! Do this now! We're going to get your computer to give you a choice whenever it starts: "Boot Linux or Windows?" We're going to try and keep your existing Windows installation intact, but give you some options for refreshing your Windows installation, too - as well as some options for removing Windows and switching to Linux completely! I can't walk you through it for Mac OS X right now, but I'll work on supporting that. Linux will install onto most systems running OS X... These instructions are for desktops, laptops, netbooks, and ultrabooks. However, Linux will run on a number of devices, including many mobile devices. You can visit the websites of some Linux "distros" in the Downloads section of this post and check out the latest releases! Installing with Windows is easy! The installation options in this post will cover Windows 95, 98, ME, 2000, XP, Vista, 7, and 8! Yep. There are even specialized versions of Linux designed to get machines that were once collecting dust up and running again. We'll get to all of that, but let's start by supercharging your computer with the most powerful OS on the planet! |
|||||||
|
|||||||
Choose An Installation Type |
|||||||
This installation guide works best if you have a second way to access the Internet besides the computer you're installing Linux on. That way, you can keep this guide in front of you during restarts or installation. The Ubuntu Windows Installer installation option and the KDE for Windows installation option will be easiest for people with only one way to access the Internet. For many users, the Quick & Easy installation option will not involve any difficult tasks during installation, and the Switch to Linux/Remove Windows installation option is pretty simple... You can print these instructions so you can use them during certain tasks, however, you will not be able to make use of the links that jump to other parts of this post. If you print these instructions, use the printed version only until certain tasks are completed, then return to this post so you don't miss any steps. |
|||||||
|
|||||||
Quick & Easy Setup for Any Linux Distro |
|||||||
Please note: "Quick & Easy" Installation is for Windows Vista, 7, and 8 only... In Windows Vista and 7, click the Start Menu and type Computer Management into the search box. Click on Computer Management. Alternately, you can go to Control Panel>Administrative Tools>Computer Management. Once in Computer Management, click Disk Management in the left pane. In Windows 8, Disk Management is located in Apps Screen>Windows System>Control Panel>System and Security>Administrative Tools>Computer Management. Once in Computer Management, click Disk Management in the left pane. |
|||||||
|
|||||||
Once Disk Management is open in Windows Vista, 7, or 8... Right click "Drive C:" in the top pane and choose "Shrink Volume." Give yourself as much space as you can while still leaving a little room to play in Windows. Let's say 10% is a little room. You can always blow out Linux and change it back later... |
|||||||
|
|||||||
That's it! - If this was your first attempt at shrinking your partition and it didn't shrink, didn't shrink enough, or didn't shrink to your liking, click HERE. - If you have attempted to shrink your partition more than once, and have just been successful, click HERE to check/uncheck the boxes you unchecked/checked when you prepared the partition. No need to make Windows mad! - If you have attempted to shrink your partition more than once, and it hasn't shrunk, hasn't shrunk enough, or hasn't shrunk to your liking, click HERE. Otherwise, it's time to install Linux... |
Install Linux |
||||||||||||||||||||||||||||||||||||
Choose a distro. I like Fedora and Kubuntu, but you can choose whatever you want. Ubuntu is the most popular right now. SUSE is supported by Novell, and openSUSE is its cousin. There's also Debian, Slackware, and a bunch of others. |
||||||||||||||||||||||||||||||||||||

|
||||||||||||||||||||||||||||||||||||
Don't download the USB version unless you are sure your computer can boot from USB, and you have a USB of sufficient size - usually 2 GB or more. If you want to check your BIOS now to see if you can boot from USB, click HERE (there will be a link to return you to this area). |
||||||||||||||||||||||||||||||||||||
|
||||||||||||||||||||||||||||||||||||
Desktop Choice: You might be asked to choose a desktop before you download. There's Gnome, KDE, and some others like LXDE and XFCE. I like KDE right now, but I like Gnome, too. I've never tried LXDE or XFCE... Old Computers: Ubuntu appears to have very minimal system requirements, and is likely the best choice for many older machines with Windows XP or above. Puppy Linux is designed to run on much older PC's, all the way back to Windows 95. It is a limited version of Linux that will not run some software. You can run Firefox, Chrome, LibreOffice, listen to and/or view multimedia, and play Linux games, as well as run some other software. It comes with its own Package Installer in the menu. It will fit on a CD-R/RW if you have an old computer that won't boot a DVD-R/RW. (If your computer doesn't have at least a CD-R/RW drive - or if you can't boot from it - and you have no USB support, click HERE.) - Puppy Linux 5.4.3 CD - Create Puppy Linux USB from CD - Home Page |
||||||||||||||||||||||||||||||||||||

|
||||||||||||||||||||||||||||||||||||
Install: Burn the Installation DVD or Create a Bootable USB Stick: Download the software and burn it to a DVD-R/RW (if you are installing Puppy Linux, you can use a CD-R/RW). Windows Vista, 7, and 8 are all able to burn CD's and DVD's without additional software. Windows XP and earlier versions of Windows require Nero or other disc burning software. Put a blank disc in the drive and Windows should ask you to begin creating your disc. In this case, you are burning a BOOTABLE (ISO) disc. Simply drag the file you downloaded into the disc burning pane, and the software should burn a bootable disc. |
||||||||||||||||||||||||||||||||||||
|
||||||||||||||||||||||||||||||||||||
If you are creating a bootable USB drive or device, the download links for each distro provided instructions for creating a bootable USB drive or device using provided software. If the computer you're installing Linux on is your only way of accessing the Internet, you can read ahead for more information about the installation process. If you're installing Linux using another installation option, such as Switch to Linux/Remove Windows, click the appropriate link below for information tailored to your specific installation. Once you've done all that, re-insert the Linux bootable disc into your DVD drive, or plug in the bootable USB device, and restart the computer. Check Your BIOS If You're Having Trouble Booting Via CD, DVD, or USB: Restart your computer and look for a message when it starts up that says "Press F2 to enter Setup" or "Press ESC to enter BIOS" or "Press DEL to enter BOOT" or something like that. You only have a few seconds. Reboot as often as you need to, and repeatedly tap F2 or ESC or Spacebar or whatever button it indicates. |
||||||||||||||||||||||||||||||||||||
|
||||||||||||||||||||||||||||||||||||
Once you're in the BIOS, you sometimes have to find "Boot" or "Boot Options" or something similar using menus and arrow keys. It's fairly straight-forward. You need the CD/DVD (or USB) to be the first boot device, and the hard drive or HDD to be the second boot device. You should also disable QuickBoot/FastBoot and Intel Smart Response Technology (SRT). Once you've changed all this, press the button indicated to "Save and Exit." Your computer should now boot via CD, DVD or USB. [If you need to return to the Downloads section, click HERE...] |
||||||||||||||||||||||||||||||||||||
 |
||||||||||||||||||||||||||||||||||||
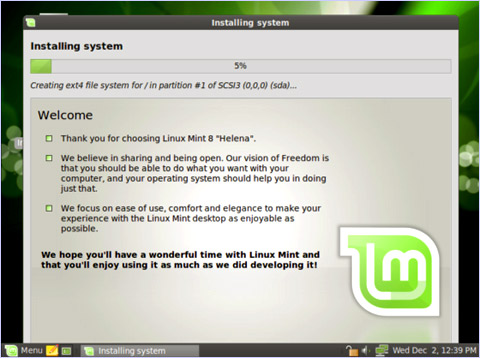
[If you're Switching to Linux/Removing Windows, click HERE to jump back...] Installation: The installation program will offer to automatically set up partitions using free space. That's what you want. You want Linux to use the free space. The next part is not going to make any sense at all if you're not familiar with Linux, so just let it do its thing. Accept the defaults. If something looks screwy (like it looks bigger than the free space), worry then. Otherwise, you're fine. Nothing will happen until you confirm everything, so if you accept the defaults, you'll still get a chance to change it, and you can sort of learn about what it wants. If you find yourself partitioning manually, I'm offering a basic setup. Remember, there are lots of ways to do it. You should see one or two existing partitions, and some free space. The existing partition or partitions will probably belong to Windows. The smaller of the two is likely the rescue partition. The existing partitions are probably "primary," which is only important here insofar as you are only allowed 4 primary partitions. Create your Linux partitions in order according to the table below: |
||||||||||||||||||||||||||||||||||||
|
||||||||||||||||||||||||||||||||||||
|
||||||||||||||||||||||||||||||||||||
Along the way, you'll need to pick a "root" password. "Root" is the administrative user, and it works differently than in Windows. You can't always be the administrative user in Linux like you can in Windows. You won't be able to run many programs as "root." "Root" just does administrative things. It will reboot at some point and you'll see the menu asking you whether you want Linux or Windows. (You should have been prompted to remove the Linux installation disc.) If you see two Windows choices, the first one will be the rescue partition, not regular Windows. So if you choose that one, don't rescue Windows! Just reboot and choose the other Windows boot option. Make sure Windows still works. Then restart and boot Linux. You'll be asked to choose a user name password. That's YOU! You're the user. Just pick a name and password... You should be able to figure everything out, and it should be easy. Have fun! Install Steam: Steam for Linux is here! There are lots of easy ways to install Steam... One-click Installation: Your browser should ask you if you want to install Steam... - Fedora 18 Steam Installer.rpm - Ubuntu/Kubuntu 12.04 & 12.10 Steam Installer.deb (you may have to download and click) - openSUSE 12.2 Steam Installer.ymp Package Installers: - Fedora users can install Steam with Yum or another package installer after completing the post-installation below. EasyInstall Info: Everyone can install Steam easily by visiting the page below. No matter what distro of Linux you're using, whether its an older version or the latest release, Steam is now putting together a resource for easy installation: - Steam EasyInstall Info |
||||||||||||||||||||||||||||||||||||

|
||||||||||||||||||||||||||||||||||||
Post-Install |
This section was originally written for Fedora users, but it's turned into a post-install for everyone. I'm currently trying Kubuntu, and I've already inserted a couple of things for Kubuntu users. A lot of the stuff is pretty generic, though... Each distro comes with a package installer (Yum, Yast, Muon, Ubuntu Software Center, etc.), and you can use the menu to get to it and install Yum Extender if it's not already installed. I'm just learning about Muon in Kubuntu, and I like that one, too... Fedora Users Only: Not everything is in the package installer. This file will help with the package installer and other things for Fedora users. If you're using Fedora, install this. Your browser will ask you if want to install it. You do... - Popular Fedora "Post-Installer".rpm It will install into the menu, and you have to go into the menu and click "Easy Life" to complete the install. To keep up with the latest Post Installers, driver resources, and other cool stuff, check out this resource page: - Fedora Post Install Home If, for some reason, everything isn't fixed, try this (Fedora 18 only): - In Case Everything Doesn't Work in Fedora.rpm Helpful Tips For All Linux Users: The file manager in Gnome and KDE have an icon that looks like file cabinet. The Gnome file manager is called Nautilus, and the KDE file manager is called Dolphin. You'll see your Windows partition in there. Your "My Documents" and all of that are in your Windows partition. If you click on your Windows partition, your Windows fonts are in C:\Windows\Fonts. Just click on the ones you want to install. Pick Verdana and Arial for sure... Click on a font in Windows\Fonts, then click the "Install" button. If it asks you about "system wide," sure, why not? |
|
To Install Java: A lot of web pages use Java (which is different from Javascript) to bring increased functionality to their web sites. To install Java for in your browser, all you have to do is search for "icedtea-web" in your package installer. Install the packages "icedtea-6-plugin" and "icedtea-7-plugin," and all of the needed files will be automatically included. Be sure to restart your browser if it is open during the installation... Helpful Stuff to Install: Before you get into entering commands, installing from source, or editing system files, it helps to have the stuff below installed. Use your package installer to install this stuff, or verify that it already installed: - automake - libtool - gcc - g++ - ia32-libs (x_64 systems) Basic Commands / Editing System Files: Nowadays, you should be able to point and click your way through just about anything. But if you find yourself bumbling around in Terminal, here are some basic commands (leave the quotes off the commands, of course): - You'll find a lot of stuff online that wants you to install from Terminal. That's not the NewsKing way... Why not use Yum or Muon or another package installer? In any case, if you must do it in Terminal, be aware that only root can install certain software or edit system files. To become root, type "su root" and enter the root password when it ask (if you installed Kubuntu and weren't asked to set a root password, type "sudo passwd" and enter what you want the root password to be). To stop being root, type "exit". You might need to become root if you're installing something from Terminal and get an error in the second or third step, or can't launch the program after its installed. - You'll need a text editor to edit certain files. If you don't know which text editors you have or how to use them, use a package installer to install Emacs (type emacs in the package installer's search box). - To launch a system file in a text editor from Terminal, you type "su root", enter the password, then type the name of the text editor and the name and path of the system file. So, "su root" and enter your root password. Then, "emacs ~/path/filename". (Try "emacs ~/.fonts.conf", and paste this in... That'll smooth your Windows fonts...) - Did you download something that didn't work when you clicked on it in the Nautilus or Dolphin file manager? Try "./filename". That'll only work if you open a new Terminal, and if the file is in your "Home" folder, not a subfolder like "Downloads." To change folders, type "cd Downloads". To get a list of files and folders, type "ls". To return home, type "cd ~/". You should be able to figure everything out, and it should be easy. Have fun! |
Refresh Windows |
Prepare The Partition |
- If you are here to refresh Windows, have never refreshed Windows before, did not come here through a link in the Quick & Easy installation option, and did not come here through a link somewhere else in the Refresh Windows installation option, click HERE to begin! - If you are here because you are attempting the Quick & Easy installation option for the first time and the partition didn't shrink, didn't shrink enough, or didn't shrink to your liking, and you have never attempted any part of the Refresh Windows installation option before, you need to complete parts 1-4 of this procedure. After completion, you will be returned to the Quick & Easy installation section to re-attempt to shrink your partition. Click HERE. - If you are here because you have attempted the Quick & Easy installation option more than once, and the partition didn't shrink, didn't shrink enough, or didn't shrink to your liking, and you have attempted parts 1-4 of this procedure, but have not attempted to complete the Refresh Windows installation option, you should complete the Refresh Windows installation option now, or consider the Ubuntu Windows Installer installation option, the KDE for Windows installation option, or the Switch to Linux/Remove Windows installation option. To try the Refresh Windows installation option, click HERE. - If you've used Gparted and installed Windows, but did not have an installation disc, complete parts 2-4 of this procedure. You should attempt to shrink your partition again after completing this procedure. You may have already completed this procedure prior to using Gparted and installing Windows without an installation disc, but you need to complete parts 2-4 again with your new "minimal" Windows installation. It is very likely that your partition will shrink after completing the procedure this time. Click HERE. - If you have completed parts 2-4 of this procedure after completing a Refresh Windows installation without an installation disc, and were still unable to shrink your partition, you should try the Ubuntu Windows Installer installation option, the KDE for Windows installation option, or the Switch to Linux/Remove Windows installation option. Various Linux distros may have tools that can help you sort things out as well. For example, Ubuntu's regular installer is believed to be able to move stubborn partitions and preserve Windows. If you want to try a regular Ubuntu installation, click HERE. Otherwise, click HERE to check/uncheck the boxes you unchecked/checked when you prepared the partition. No need to make Windows mad! - If you came here through a link from the "If All Else Fails" section of the Refresh Windows installation option for the purpose of completing parts 2 and 3, complete parts 2 and 3 of this procedure now. Click HERE. PART 1 Restart the computer... Delete Some Files: Delete any large files you don't need. These can include videos, pictures, music, large documents, and downloads. Make a backup on a DVD-R/RW or Thumb drive if you plan on deleting anything you think you'll need. Uninstall a Few Programs: To uninstall programs, go into the Control Panel and choose "Add/Remove Programs," "Programs and Features," or "Programs" (depending on your Windows version). |
|
PART 2 Disable Pagefile: Windows XP: Right click on My Computer and choose Properties; click the Advanced tab; in the Performance section, click the Settings button; click the Advanced tab; in the Virtual Memory section, click the Change button; check No Paging File. Click OK, then OK again. Windows Vista: Open the Control Panel and double-click System and Maitenance; double-click System; click the Advanced System Settings button; click the Advanced Tab; In the Performance section, click the Settings button; click the Advanced tab; in the Virtual memory section, click the Change button; uncheck "Automatically manage paging file size for all drives," and check "No paging file." Click the Set button, then answer Yes. Click OK. Windows 7: Open the Control Panel and double-click System; click the Advanced System Settings button; click the Performance tab, and click the Settings button; click the Advanced tab; in the Virtual Memory section click the Change button; uncheck "Automatically manage paging file size for all drives," and check "No paging file." Click the Set button, then answer Yes. Click OK. Windows 8: Open the Control Panel and double-click System and Security; double-click System; click Advanced System Settings; click the Advanced tab; in the Performance section, click the Settings button; click the Advanced tab; in the Virtual memory section, click the Change button; uncheck "Automatically manage paging file size for all drives" and check "No paging file." Click the Set button, then answer Yes. Click OK. Disable System Restore: Windows XP: Right-click My Computer, and then click Properties. In the System Properties dialog box, click the System Restore tab. Check the "Turn off System Restore check box," or check the "Turn off System Restore on all drives" check box. Click OK. Answer Yes. Click OK. Windows Vista & 7: Right-click My Computer, and then click Properties. In the System Properties dialog box, click System Protection in the left pane. Click the Configure button. Check "Turn off System Protection." Click OK, then OK again. Windows 8: Open the Control Panel and double-click System and Security. Double-click System. Click System protection, and select Local Disk (C:). In the System section for (C:), click the Configure button. Select "Disable system protection." Click OK. Disable Write Debugging Information: Windows XP: Right-click the My Computer icon on the Windows desktop. Click Properties. Click the Advanced tab. In the Startup and Recovery section, click the Settings button. Clear the Automatically Restart check box. Change the option in the Write debugging information section to Kernel Memory Dump. Click OK, then click OK again. Windows Vista & 7: Open the Control Panel’ and double-click System. Click Advanced System Settings in the left pane. Click the Advanced tab. In the Startup & Recovery section, click the Settings button. In the Write Debugging Info section, select None. Click OK, then click OK again. Windows 8: Open the Control Panel and double-click System and Security. Double-click System. Click Advanced System Settings. Click the Advanced tab. In the Startup and Recovery section, click the Settings button. Change "Write debugging information" from "Automatic memory dump" to "None." Click OK. |
|
Disable Hibernation: Windows XP: Open the Control Panel and double-click Power Options. Click the Hibernation tab. Uncheck "Enable." Click OK. Windows Vista & 7: Open a Command Prompt from Start>Programs>Accesories>System Tools. Type "powercfg /h off" (without the quotes) and press Enter. Close the Command Prompt window. (Later, you'll type "powercfg /h on" to turn it back on.) Windows 8: Mouse to the lower left corner and right-click Command Prompt. Open it as the administrator. Type "powercfg /hibernation off" (without the quotes) and press Enter. Close the Command Prompt window. (Later, you'll type "powercfg /hibernation on" to turn it back on.) - If you returned to this section to check/uncheck the boxes you unchecked/checked when you prepared the partition, restart the computer and... --> Click HERE if you haven't yet made installation discs or USB media to install Linux. --> Click HERE if you've already made installation discs or USB media, and install Linux now. PART 3 Run Disk Cleanup: Windows XP, Vista & 7: Disk Cleanup is located in Accesories>System Tools>Disk Cleanup. Check every box. Complete Disk Cleanup. Windows 8: Disk Cleanup is located in Control Panel>Administrative Tools>Disk Cleanup. Check every box. Complete Disk Cleanup. - If you are only completing parts 2 and 3 of this procedure, restart the computer and click HERE. PART 4 Run Disk Defragmenter: Restart the computer. Windows XP, Vista & 7: Disk Defragmenter is located in Accessories>System Tools>Disk Defragmenter. Windows 8: You can start Disk Defragmenter by opening My Computer and clicking the Optimize button. To locate My Computer, right click the desktop and choose Personalize. Click "Change Desktop Icons" in the left pane, and put a check mark next to "Computer" in the right pane. The My Computer icon will now appear on the desktop. |
|
Tired watching Disk Defragmenter defragment? There's no disk defragmentation in Linux! Hang in there! Allow your hard drive to finish defragmenting, and restart the computer. - If you are making another attempt at shrinking your partition, click HERE. - If you are in the middle of refreshing Windows, click HERE. |
Before You Go Any Farther: If you want to Refresh Windows, you should do it before you install Linux. Refreshing Windows after Linux is installed will take away the boot menu. The boot menu is what gives you a choice of booting either Linux or Windows. If you refresh Windows after you install Linux, you'll only be able to boot into Windows, and will probably have to re-install Linux. The boot menu can be repaired without re-installing Linux, but the procedure is different for each Linux distro and each release of each distro, and is not always easy... |
|||||||||||||||||||||||||||||||||||||
|
|||||||||||||||||||||||||||||||||||||
Don't download the USB versions of this software or use the utilities below to create bootable USB drives or devices unless you are sure your computer can boot from USB, and you have a USB drive or device of sufficient size. If you want to check your BIOS now to see if you can boot from USB, click HERE (there will be a link to return you to this area). Getting Started: All Windows Users: - Download the Gparted bootable disc and burn to a CD-R/RW or DVD-R/RW (burn a BOOTABLE/ISO disc). - If you want a bootable USB drive or device instead of a CD or DVD, Gparted for USB drives or devices is available here, along with instructions on how to prepare a bootable USB drive or device with Gparted. This can be a smaller USB drive or device than you used for your Linux distro, if you prepared a USB drive or device with your Linux distro. You cannot use the same drive or device. Windows 95, 98, ME, and 2000 Users: - Download the Fdisk/Format bootable disc and burn to a CD-R/RW or DVD-R/RW (burn a BOOTABLE/ISO disc). - If you want a bootable USB drive or device instead of a CD or DVD, use this utility to place the Fdisk/Format image on a bootable USB drive or device. This drive or device can be only a few megabytes in size, but it can't be the same drive or device you used for other bootable images. - If your Windows installation disc is not bootable (95, 98, & ME may not have been), download and create this bootable floppy as well. Just insert a blank floppy, and the file will extract and create a bootable floppy. You can test your Windows installation disc by inserting it into the CD/DVD drive and restarting the computer. If it doesn't boot, you can check your BIOS HERE. You'll see a link to return to this section after you test your BIOS. If your BIOS allows you to boot from your CD/DVD device and the Windows installation disc still doesn't boot, it probably isn't bootable. As long as you can boot from your CD/DVD device in the BIOS, you can continue, whether your Windows installation disc is bootable or not. Just make sure you created the bootable floppy, as well as the Fdisk/Format bootable CD/DVD disc. For now, leave your CD/DVD device as the first boot device in your BIOS. If you cannot boot from the CD/DVD device in your BIOS, click HERE. Burn the CD's, DVD's, or Create Bootable USB Drives or Devices: Windows Vista, 7, and 8 are all able to burn CD's and DVD's without additional software. Windows XP and earlier versions of Windows require Nero or other disc burning software. Put a blank disc in the drive and Windows should ask you to begin creating your disc. In this case, you are burning a BOOTABLE (ISO) disc. Simply drag the file you downloaded into the disc burning pane, and the software should burn a bootable disc. |
|||||||||||||||||||||||||||||||||||||
|
|
|||||||||||||||||||||||||||||||||||||
If you are creating a bootable USB drive or device, the download links for creating a bootable USB drive or device, located above, provided instructions. NOTE: Older computers might not boot a DVD-R/RW or USB drive or device, so use a CD-R/RW. Backup Your Files: Insert another blank disc, or plug in another USB drive or device. Back up your files on another CD-R/RW or DVD-R/RW, or USB drive or device. All you have to do is back up "My Documents," "My Pictures," "Downloads," and stuff like that. If you can, grab your bookmarks... If you're more comfortable doing a Windows File Backup, you can perform one, but do not create a System Image Backup to restore your files, and do not back up system or data files. This may damage the partitions we are about to create for Linux. We'll be creating a System Image Backup later. Windows Installation Disc: If your computer didn't come with Windows on a disc, or if you lost your disc, you may have your work cut out for you. Windows can create a Windows System Image Backup to re-install Windows for XP, Vista, 7, and 8 Windows users, and we'll be doing that later if you haven't done it already. Unfortunately, this kind of installation disk will remove the partitions we are about to setup to install Linux, so we can't use it to install Windows without wiping out Linux. You can often buy or freely obtain a new Windows Installation disc from your computer manufacturer, but they may only sell you a System Image Disc that could also remove the partitions we're setting up for Linux. You may be able to buy a Windows Installation disc for your version of Windows from Microsoft, or another online source such as Amazon or eBay. Most Windows 95, 98, ME, and 2000 users have an installation disc, and many XP users do, too. If you have a Windows 95, 98, ME, or 2000 installation disc and want to use it, click HERE to continue. Sometimes, however, discs get lost. And not all XP users have a disc. |
|||||||||||||||||||||||||||||||||||||
|
|||||||||||||||||||||||||||||||||||||
You can download an installation disc below for Windows XP, Vista, or 7 if you don't have a disc or if you lost it. Windows 95, 98, ME, and 2000 users can also try the Windows XP download. If you have Windows 95, 98, ME, or 2000 and decide to try the XP download, proceed at your own risk and realize that your computer may not operate properly, and will not be able to be restored to its present state without an installation disc for the correct operating system, or a 3rd party backup. Windows 95, 98, ME, and 2000 do not allow users to create a System Image Backup, so the computer can't be restored if something goes wrong. All downloads can be burned to a USB drive or device if necessary. Windows 8 users who cannot procure a "Developer's Edition" should click HERE to continue. Download Windows Installation Discs: These are legal copies designed to work with the product code stamped on your computer or found in the documentation that came with your computer. As I understand it, Microsoft makes the links available to the Internet, but keeps the URL a secret unless you are a paid subscriber of a related download service. Members leak the links, and they are left available to the public. You just have to make sure you download the correct version and edition. |
|||||||||||||||||||||||||||||||||||||
|
|||||||||||||||||||||||||||||||||||||
Make sure you can create an installation disc. It needs to be a BOOTABLE/ISO disc like you created earlier. You can try this utility to create a bootable USB drive or device. Whichever you choose, boot from it and make sure that it works. If it doesn't boot, try changing your BIOS. Restart the computer with the disc in the drive and look for a message when it starts up that says "Press F2 to enter Setup" or "Press ESC to enter BIOS" or "Press DEL to enter BOOT" or something like that. You only have a few seconds. Reboot as often as you need to, and repeatedly tap F2 or ESC or Spacebar or whatever button it indicates. |
|||||||||||||||||||||||||||||||||||||
|
|||||||||||||||||||||||||||||||||||||
Once you're in the BIOS, you sometimes have to find "Boot" or "Boot Options" or something similar using menus and arrow keys. It's fairly straight-forward. You need the CD/DVD (or USB) to be the first boot device, and the hard drive or HDD to be the second boot device. You should also disable QuickBoot/FastBoot and Intel Smart Response Technology (SRT). Once you've changed all this, press the button indicated to "Save and Exit." Try to boot your installation disc again. |
|||||||||||||||||||||||||||||||||||||
|
|||||||||||||||||||||||||||||||||||||
Do not install Windows now. If you tested your boot CD, DVD, or USB drive or device, exit the installation and remove the CD, DVD, or USB drive or device. About that product code... Depending on the version, Windows may wait 30-90 days to ask for a product code. The product code stamped on your computer or found in the documentation should work, but there is no guarantee it will work. You may have to purchase a new product code, or your OS may become disabled. Create a Windows System Image before continuing. This will allow you to restore your system in case your product code doesn't work. System Image Tutorials: (XP, Vista, 7, 8). If you have Windows 95, 98, ME, or 2000 on your system, you should have already performed a regular backup. You cannot create a System Restore Image without 3rd party software, so click HERE to continue with a Windows XP installation. Users creating a System Restore Image can save the system image to a USB drive or device. Along the way you may also be asked to create a boot disk, which you should do. Putting the boot disk on a USB drive or device is not supported under Windows XP, Vista, or 7, but you can try it using this utility. Unfortunately, this requires you to make a CD or DVD first. This should not be a problem for most XP users (not many XP netbooks, not many XP machines with USB boot option...). Windows Vista and 7 users can opt not to create the boot disk, download one from here, and use this utility to transfer it to a USB drive or device. Windows 8 has an option for USB drives or devices. Finally, follow the instructions below for users with a Windows Installation Disc. Click HERE. If All Else Fails, Try This: If you have a system with Windows XP, Vista, 7, or 8 and do not have an installation disc, were unable to use any of the other installation options above, and are unable to obtain an installation disc by purchasing one, there is still an option for you, and it will make refreshing Windows easier. - If you have never completed any part of the Preparing The Partition procedure, complete parts 2 and 3 now. Click HERE. - If you completed the parts of the Preparing The Partition procedure you were supposed to complete, continue... Since you've already backed up your files, delete them from the hard drive. Delete everything in Downloads, My Documents, My Pictures, My Music, My Videos, etc. Delete the files you used to create any CD-R/RW's, DVD-R/RW's, or setup any USB devices in the steps above. Empty the Recycle Bin. Then, go into the Control Panel and choose "Add/Remove Programs," "Programs and Features," or "Programs" (depending on your Windows version). Remove all of the programs except for Internet Explorer and sound, video, and device-specific programs you think may have come with your computer. You can even remove your anti-virus program because you can download it again later. Remove browsers such as Firefox and Chrome. Remove MS Office. Remove all games. Basically, remove everything you can. |
|||||||||||||||||||||||||||||||||||||
|
|
|||||||||||||||||||||||||||||||||||||
Run Disk Defragmenter: - Restart the computer. - Some people may have already run Disk Defragmenter. It is necessary to run it again because additional files were deleted. - Windows XP, Vista & 7: Disk Defragmenter is located in Accessories>System Tools>Disk Defragmenter. - Windows 8: You can start Disk Defragmenter by opening My Computer and clicking the Optimize button. To locate My Computer, right click the desktop and choose Personalize. Click "Change Desktop Icons" in the left pane, and put a check mark next to "Computer" in the right pane. The My Computer icon will now appear on the desktop. |
|||||||||||||||||||||||||||||||||||||
|
|
|||||||||||||||||||||||||||||||||||||
Tired watching Disk Defragmenter defragment? There's no disk defragmentation in Linux! Hang in there! After defragmenting is completed, restart the computer. Open "My Computer," right click C:, and choose "Properties." Write down how much space Windows is using. Windows 8 users should have placed a My Computer icon on the desktop in the previous step. |
|||||||||||||||||||||||||||||||||||||

|
|||||||||||||||||||||||||||||||||||||
Next, create a Windows System Image Backup of your minimal installation. Use these tutorials (XP, Vista, 7, 8). If your copy of XP doesn't have the Backup Utility, it means you have an installation CD somewhere. But you can download one HERE and install the backup utility. You can save the system image to a USB drive or device. Along the way you may also be asked to create a boot disk, which you should do. Putting the boot disk on a USB drive or device is not supported under Windows XP, Vista, or 7, but you can try it using this utility. Unfortunately, this requires you to make a CD or DVD first. This should not be a problem for most XP users (not many XP netbooks, not many XP machines with USB boot option...). Windows Vista and 7 users can opt not to create the boot disk, download one from here, and use this utility to transfer it to a USB drive or device. Windows 8 has an option for USB drives or devices. You can use Internet Explorer to complete the next steps if you have only one computer... |
|||||||||||||||||||||||||||||||||||||

|
|||||||||||||||||||||||||||||||||||||
| Re-partition Your Hard Drive: |
|||||||||||||||||||||||||||||||||||||
|
|||||||||||||||||||||||||||||||||||||
Once you've done all that, re-insert the Gparted bootable disc into your CD/DVD drive, or plug in the Gparted bootable USB drive or device. Restart the computer. Check Your BIOS If You're Having Trouble Booting Via CD, DVD, or USB: Restart your computer and look for a message when it starts up that says "Press F2 to enter Setup" or "Press ESC to enter BIOS" or "Press DEL to enter BOOT" or something like that. You only have a few seconds. Reboot as often as you need to, and repeatedly tap F2 or ESC or Spacebar or whatever button it indicates. |
|||||||||||||||||||||||||||||||||||||
|
|||||||||||||||||||||||||||||||||||||
Once you're in the BIOS, you sometimes have to find "Boot" or "Boot Options" or something similar using menus and arrow keys. It's fairly straight-forward. You need the CD/DVD (or USB) to be the first boot device, and the hard drive or HDD to be the second boot device. You should also disable QuickBoot/FastBoot and Intel Smart Response Technology (SRT). Once you've changed all this, press the button indicated to "Save and Exit." Your computer should now boot via CD, DVD, or USB. [If you need to return to the beginning of this section, click HERE...] |
|||||||||||||||||||||||||||||||||||||
|
|||||||||||||||||||||||||||||||||||||
Use Gparted: As Gparted starts, you'll see several screens that ask you to confirm various options. Accept the defaults by pressing "Enter." You should have to do this 4 separate times. Eventually, a desktop environment will load and Gparted will start automatically. Look at the Gparted window and write down the volume label for the Windows partition (it should be the largest partition displayed - the volume label is in the table below the drive space graphic). You're recording the volume label because, supposedly, newer versions of Windows like to use the same label. |
|||||||||||||||||||||||||||||||||||||
|
|||||||||||||||||||||||||||||||||||||
Next, click the partitions one at a time in the drive space graphic and choose "Delete" from the "Partition" menu. Delete all of the partitions. (If the mouse is not working, click HERE |
|||||||||||||||||||||||||||||||||||||
|
|||||||||||||||||||||||||||||||||||||
Click the unallocated space in Gparted's drive space graphic. (The whole bar should be unallocated at this point.) Choose "New" from the "Partition" menu. Enter the size in megabytes for the new Windows partition. The default size will be the entire hard drive, so reduce the size and give yourself room for Linux. Use the amount of space Windows is using that you wrote down earlier as a guide. 10 GB = 10240 MB. Select "ntfs" under the "File System" drop down menu. Enter the volume label you wrote down in the box that says "Label." Click "Apply." (No changes will be made until you click "Apply.") Finally, double-click exit in the upper left corner of the desktop. Select "Reboot" from the box that pops up. The Gparted CD or DVD should eject automatically as the system reboots, or prompt you to remove the USB media. - If you have an installation disc, continue with the instructions below... - If you do not have an installation disc and are using the Minimal System Image Backup you made earlier, click HERE. Install Windows: Windows XP, Vista, 7, and 8 (With Installation Disc): Eject the Gparted CD or DVD if it did not eject automatically, or remove the USB Stick. Insert the Windows Installation CD, DVD, or plug in the USB drive or device. Restart your computer. Windows installation should begin. The installation program will ask you where you want to install Windows. Select "Custom" if the choice is available. If "Custom" is not available, you should automatically be presented with certain customization options. Choose to install Windows on the partition you just created for it. It may be labeled "primary partition," "ntfs partition," "drive c:", or by the volume label you wrote down. If Windows asks about creating a recovery partition, answer no. You'll need a product code. It should be stamped on your computer or in the documentation that came with your computer, or stamped on the installation disc or disc sleeve. Make sure you have that product code! Microsoft may make you call them to confirm it, even if you enter it properly (it's a computerized call system - no real people are involved in confirming the code). Click HERE to finish up. Windows XP, Vista, 7, and 8 (No Installation Disc): Eject the Gparted CD or DVD if it did not eject automatically, or remove the USB drive or device. Insert the first Windows "Minimal System Image" CD, DVD, or USB drive or device you created above, or the Windows System Disk or Disc that corresponds to the Windows System Image. Restart your computer. Windows installation should begin. Let Windows partition and format the hard drive, but if you are given any options, try to guide it into the partition you made with Gparted. It's the NTFS partition with the volume label. You can just boot back into Gparted when it finishes and see what it did, or use Windows Disk Management to take a peek. - If it used the partition you made like we wanted it to, click HERE. - If it took over the whole hard drive and you're using Windows Vista, 7, or 8: --> Click HERE to Prepare the Partition and then shrink your Windows partition (recommended). --> Or, click HERE to try to shrink your Windows partition right now. - If it took over the whole hard drive and you're using Windows XP, shrink your Windows partition with Gparted below. Windows XP: Shrink Your Partition with Gparted: If XP wiped the partitions and took over the entire hard drive, go ahead and accept the installation as it is and boot into Windows. Click "My Computer" and right-click drive C: and choose "Properties." Write down the amount of space Windows is using. |
|||||||||||||||||||||||||||||||||||||
|
|
|||||||||||||||||||||||||||||||||||||
Insert the Gparted disc and reboot. In Gparted, resize your Windows XP partition to create free space for Linux. You'll have more free space available now that you've done a "minimal" installation. To shrink the partition in Gparted, just click on the partition and click the "Resize/Move" button. Don't make the partition smaller than the amount of space Windows took up - leave some extra space to reinstall your software and save files in Windows. Put the free space at the end (on the right). Reboot and see if XP still works. If it does not, a Windows XP installation disc may be able to repair Windows XP and save the partition for Linux. Boot from the disc and "repair an existing Windows installation." Otherwise, re-install your image backup (you can use the minimal image or the full image), and call it a day... Windows 95, 98, ME, and 2000: Eject the Gparted CD or DVD if it did not eject automatically, or remove the USB drive or device. Insert the Fdisk/Format bootable disc or USB drive or device and restart your computer. As the disc loads, you will be asked about enabling large disk support. If you have a hard drive bigger than 512MB, answer "Y." Next, you'll see an "A:>" prompt. Type "fdisk" (without the quotes), and press Enter. You should see a screen similar to the one below: |
|||||||||||||||||||||||||||||||||||||
|
||||||||||||||||||||||||||||||||||||
Select option 1 (Create DOS partition or logical DOS drive). At the next menu, select option 1 again (Create primary DOS partition). |
||||||||||||||||||||||||||||||||||||
|
||||||||||||||||||||||||||||||||||||
Fdisk will ask you if you want to use all available space. Answer "N". |
||||||||||||||||||||||||||||||||||||

|
||||||||||||||||||||||||||||||||||||
Enter the space in megabytes you need for Windows. The remaining space will be used for Linux. |
||||||||||||||||||||||||||||||||||||
|
||||||||||||||||||||||||||||||||||||
Press ESC until you return to the main menu. |
||||||||||||||||||||||||||||||||||||
|
|
||||||||||||||||||||||||||||||||||||
Select option 2. Type "1" and press "Enter." |
||||||||||||||||||||||||||||||||||||

|
||||||||||||||||||||||||||||||||||||
Press ESC to reach the main menu. Restart the computer. The computer will boot back to the A:> prompt. Type "format C:" (without the quotes) and press Enter. Answer "Y". When formatting is complete, you will be asked to enter a volume label. Enter the one you wrote down earlier. |
||||||||||||||||||||||||||||||||||||
|
||||||||||||||||||||||||||||||||||||
Remove the disc or unplug the USB drive or device. Insert the Windows Installation CD or DVD. Restart your computer. Windows installation should begin. If your Windows Installation CD or DVD is not bootable, insert your bootable floppy. Change your BIOS settings to boot from the A: drive. Boot from the A: drive, and you'll see an "A:>" prompt. Type "D:\setup.exe" (without the quotes). Windows installation should begin. Windows should automatically install into the newly created C: partition. You'll need a product code. It should be stamped on your computer or in the documentation that came with your computer, or stamped on the installation disc or disc sleeve. Make sure you have that product code! Microsoft may make you call them and confirm it, even if you enter it properly (it's a computerized call system - no real people are involved in confirming the code). NOTE: It may not be safe to connect to the Internet with Windows 95, 98, ME, or 2000. Use Linux instead. Finishing Up: Once Windows has installed, restart and make sure that it works. (You should have been prompted to remove any Windows installers.) - If you Prepared the Partition by turning off Pagefile, running disk defragmenter, etc., click HERE to check/uncheck all of the boxes you unchecked/checked to Prepare the Partition. Otherwise, click HERE to install Linux! |
||||||||||||||||||||||||||||||||||||
Switch to Linux/Remove Windows |
||||||||||||||||||||||||||||||||||||
Download your preferred version of Linux and begin installing in the Install Linux section. You'll see a link back to this section as installation begins. If the computer you're installing Linux on is your only way of accessing the Internet, be prepared to tell the installation program to delete all other partitions and use the maximum hard drive space. You can read ahead for more information. Click HERE to go to the Install Linux section. [DOWNLOAD & BEGIN INSTALL] |
||||||||||||||||||||||||||||||||||||

|
||||||||||||||||||||||||||||||||||||
Welcome back! Installation: The installation program will offer to delete all other partitions and use the maximum hard drive space. That's what you want. You want Linux to use the entire hard drive. The next part is not going to make any sense at all if you're not familiar with Linux, so just let it do its thing. Accept the defaults. If something looks screwy (like it looks bigger than the free space), worry then. Otherwise, you're fine. Nothing will happen until you confirm everything, so if you accept the defaults, you'll still get a chance to change it, and you can sort of learn about what it wants. |
||||||||||||||||||||||||||||||||||||
If you find yourself partitioning manually, I'm offering a basic setup. Remember, there are lots of ways to do it. You should see one or two existing partitions, and some free space. The existing partition or partitions will probably belong to Windows. The smaller of the two is likely the rescue partition. Delete all existing partitions. Create your Linux partitions in order according to the table below: |
||||||||||||||||||||||||||||||||||||
|
||||||||||||||||||||||||||||||||||||
|
|
||||||||||||||||||||||||||||||||||||
Along the way, you'll need to pick a "root" password. "Root" is the administrative user, and it works differently than in Windows. You can't always be the administrative user in Linux like you can in Windows. You won't be able to run many programs as "root." "Root" just does administrative things. It will reboot at some point (you should have been prompted to remove the Linux installation disc) and you may see a menu asking you whether you want Linux or a "failsafe" or something. Don't worry, that's not Windows. That's just how that distro installed. You may not see a menu at all. Either way, Linux will load automatically in a few seconds. You'll be asked to choose a user name password. That's YOU! You're the user. Just pick a name and password... You should be able to figure everything out, and it should be easy. Have fun! - Install Steam for Linux! Click HERE! - A short post-install follows Steam Installation... Click HERE!. |
||||||||||||||||||||||||||||||||||||
Cool Project! |
||||||||||||||||||||||||||||||||||||
So, you don't at least have a CD-R/RW, or if you do, you can't boot from it. I'm assuming you have no USB support. If you don't have a CD-R/RW, you need to get one, or use a friends computer to make a Puppy Linux CD. (You at least need a regular old CD-ROM drive.) You can probably buy an IDE CD-R/RW or DVD-R/RW that will work with your system. Not sure how easy that'll be to find, though. Once you have a CD-R/RW or DVD-R/RW, or a copy of Puppy Linux, try the following... |
||||||||||||||||||||||||||||||||||||

|
||||||||||||||||||||||||||||||||||||
|
||||||||||||||||||||||||||||||||||||

|
||||||||||||||||||||||||||||||||||||
| Next Go Big with Steam For Linux! | ||||||||||||||||||||||||||||||||||||
| © 2013
by T.J. Newton. All Rights Reserved. A more detailed copyright policy should be forthcoming. It will probably be similar to this one. |
|
| Next Go Big with Steam For Linux! |